

PUSKILL 2.5 SATA3 1TB Solid State Drive SSD for PS4 and Computer
Experience superior performance with the PUSKILL 2.5″ 1TB Solid State Drive SSD SATA3. With 1TB storage capacity and read speeds up to 550MB/s, it's shock-resistant and ideal for upgrading your computer systems and gaming consoles. Elevate your user experience today.
Earn 5,999 points on purchase
- Storage Capacity 1TB
- Type SATA SSD
- Read Speed 550 MB/s
About the product
PUSKILL 2.5 SATA3 1TB SSD for PlayStation 4 and Computer
.png&fileFormat=1) |
|
|
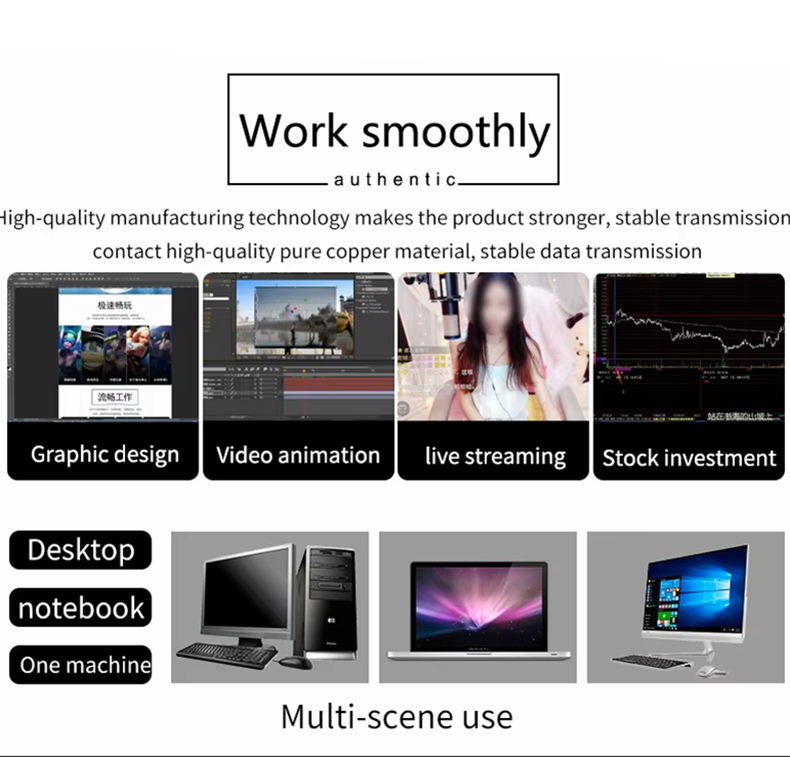 |
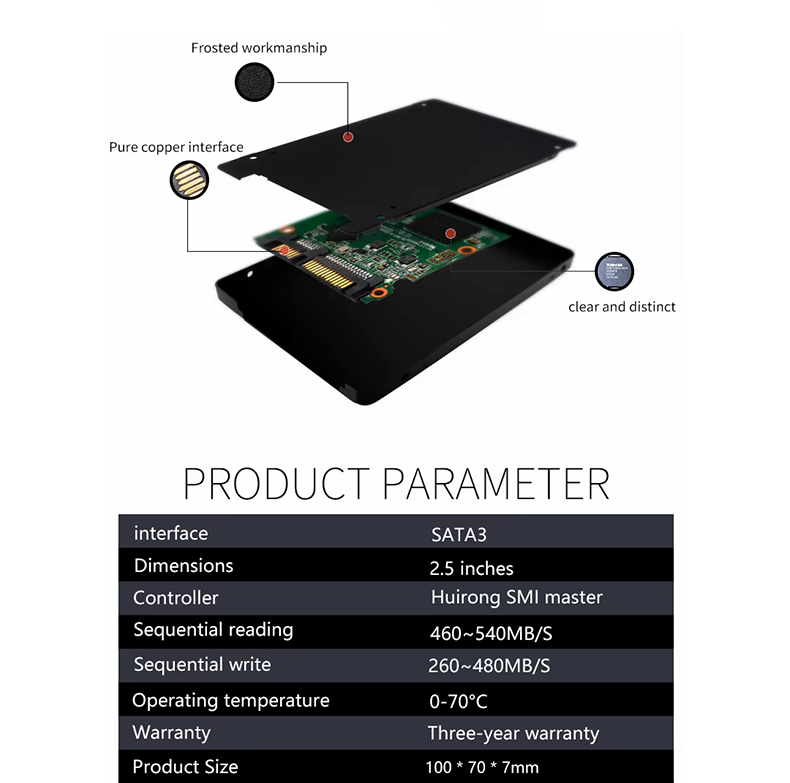
.png&fileFormat=1)
Features:
- High-Speed Performance: Read speeds up to 550MB/s and write speeds up to 500MB/s.
- Large Storage Capacity: 1TB storage for large games, updates, and save files.
- Durable Design: Built with 3D NAND technology for enhanced reliability.
- Energy Efficient: Reduced power consumption for cooler and quieter operation.
- Compatibility: Works with all PS4 models, laptops, and desktops supporting 2.5-inch SATA drives.
- Warranty: Comes with a 3-year warranty for peace of mind.
How to Replace Your PS4 Hard Drive with the PUSKILL SSD
Follow these steps to upgrade your PS4 storage to the PUSKILL SSD:
| PS4 Model | Upgrade Location | Compatible with PUSKILL SSD |
|---|---|---|
| PS4 Original | Under the shiny top cover | ✔ Yes |
| PS4 Slim | HDD bay at the rear | ✔ Yes |
| PS4 Pro | HDD bay at the rear | ✔ Yes |
Step-by-Step Guide:
- Back up your data: Use an external drive or cloud storage to save your existing PS4 data.
- Turn off the console: Ensure the PS4 is powered off and unplugged.
- Access the hard drive:
- For PS4 Original:
.webp&fileFormat=1)
Slide the top panel away from you. A click will be heard, and the panel will move about 7mm. Lift the panel off starting from the left side.
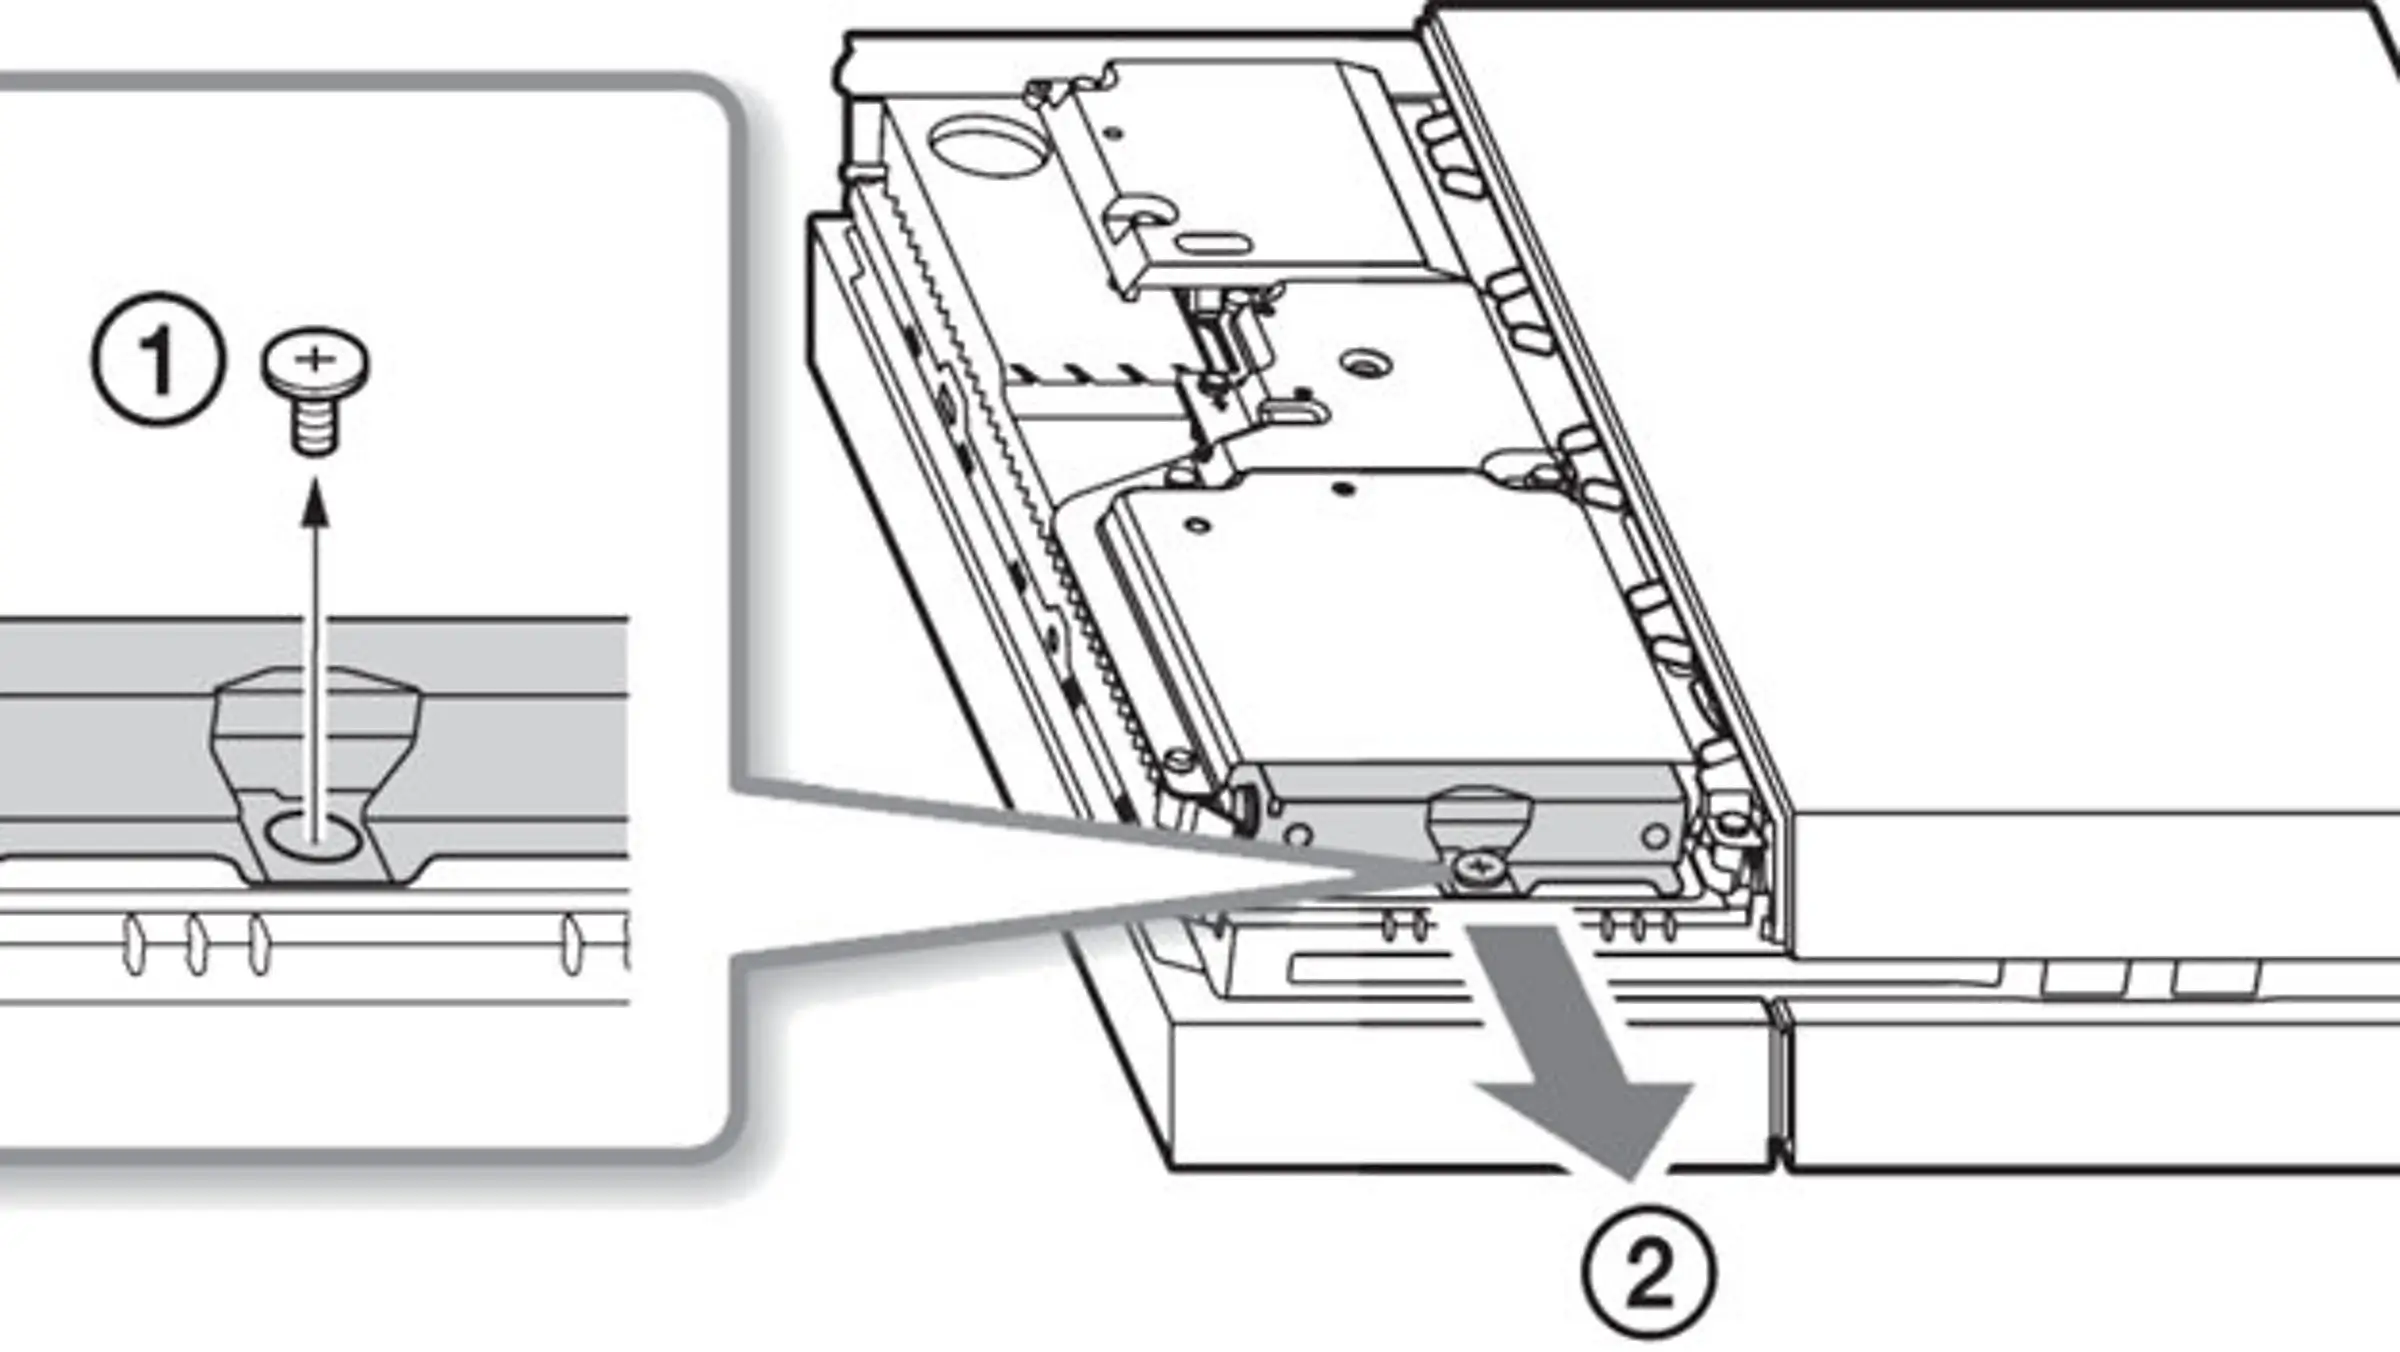
Screw with the PlayStation symbols on it.
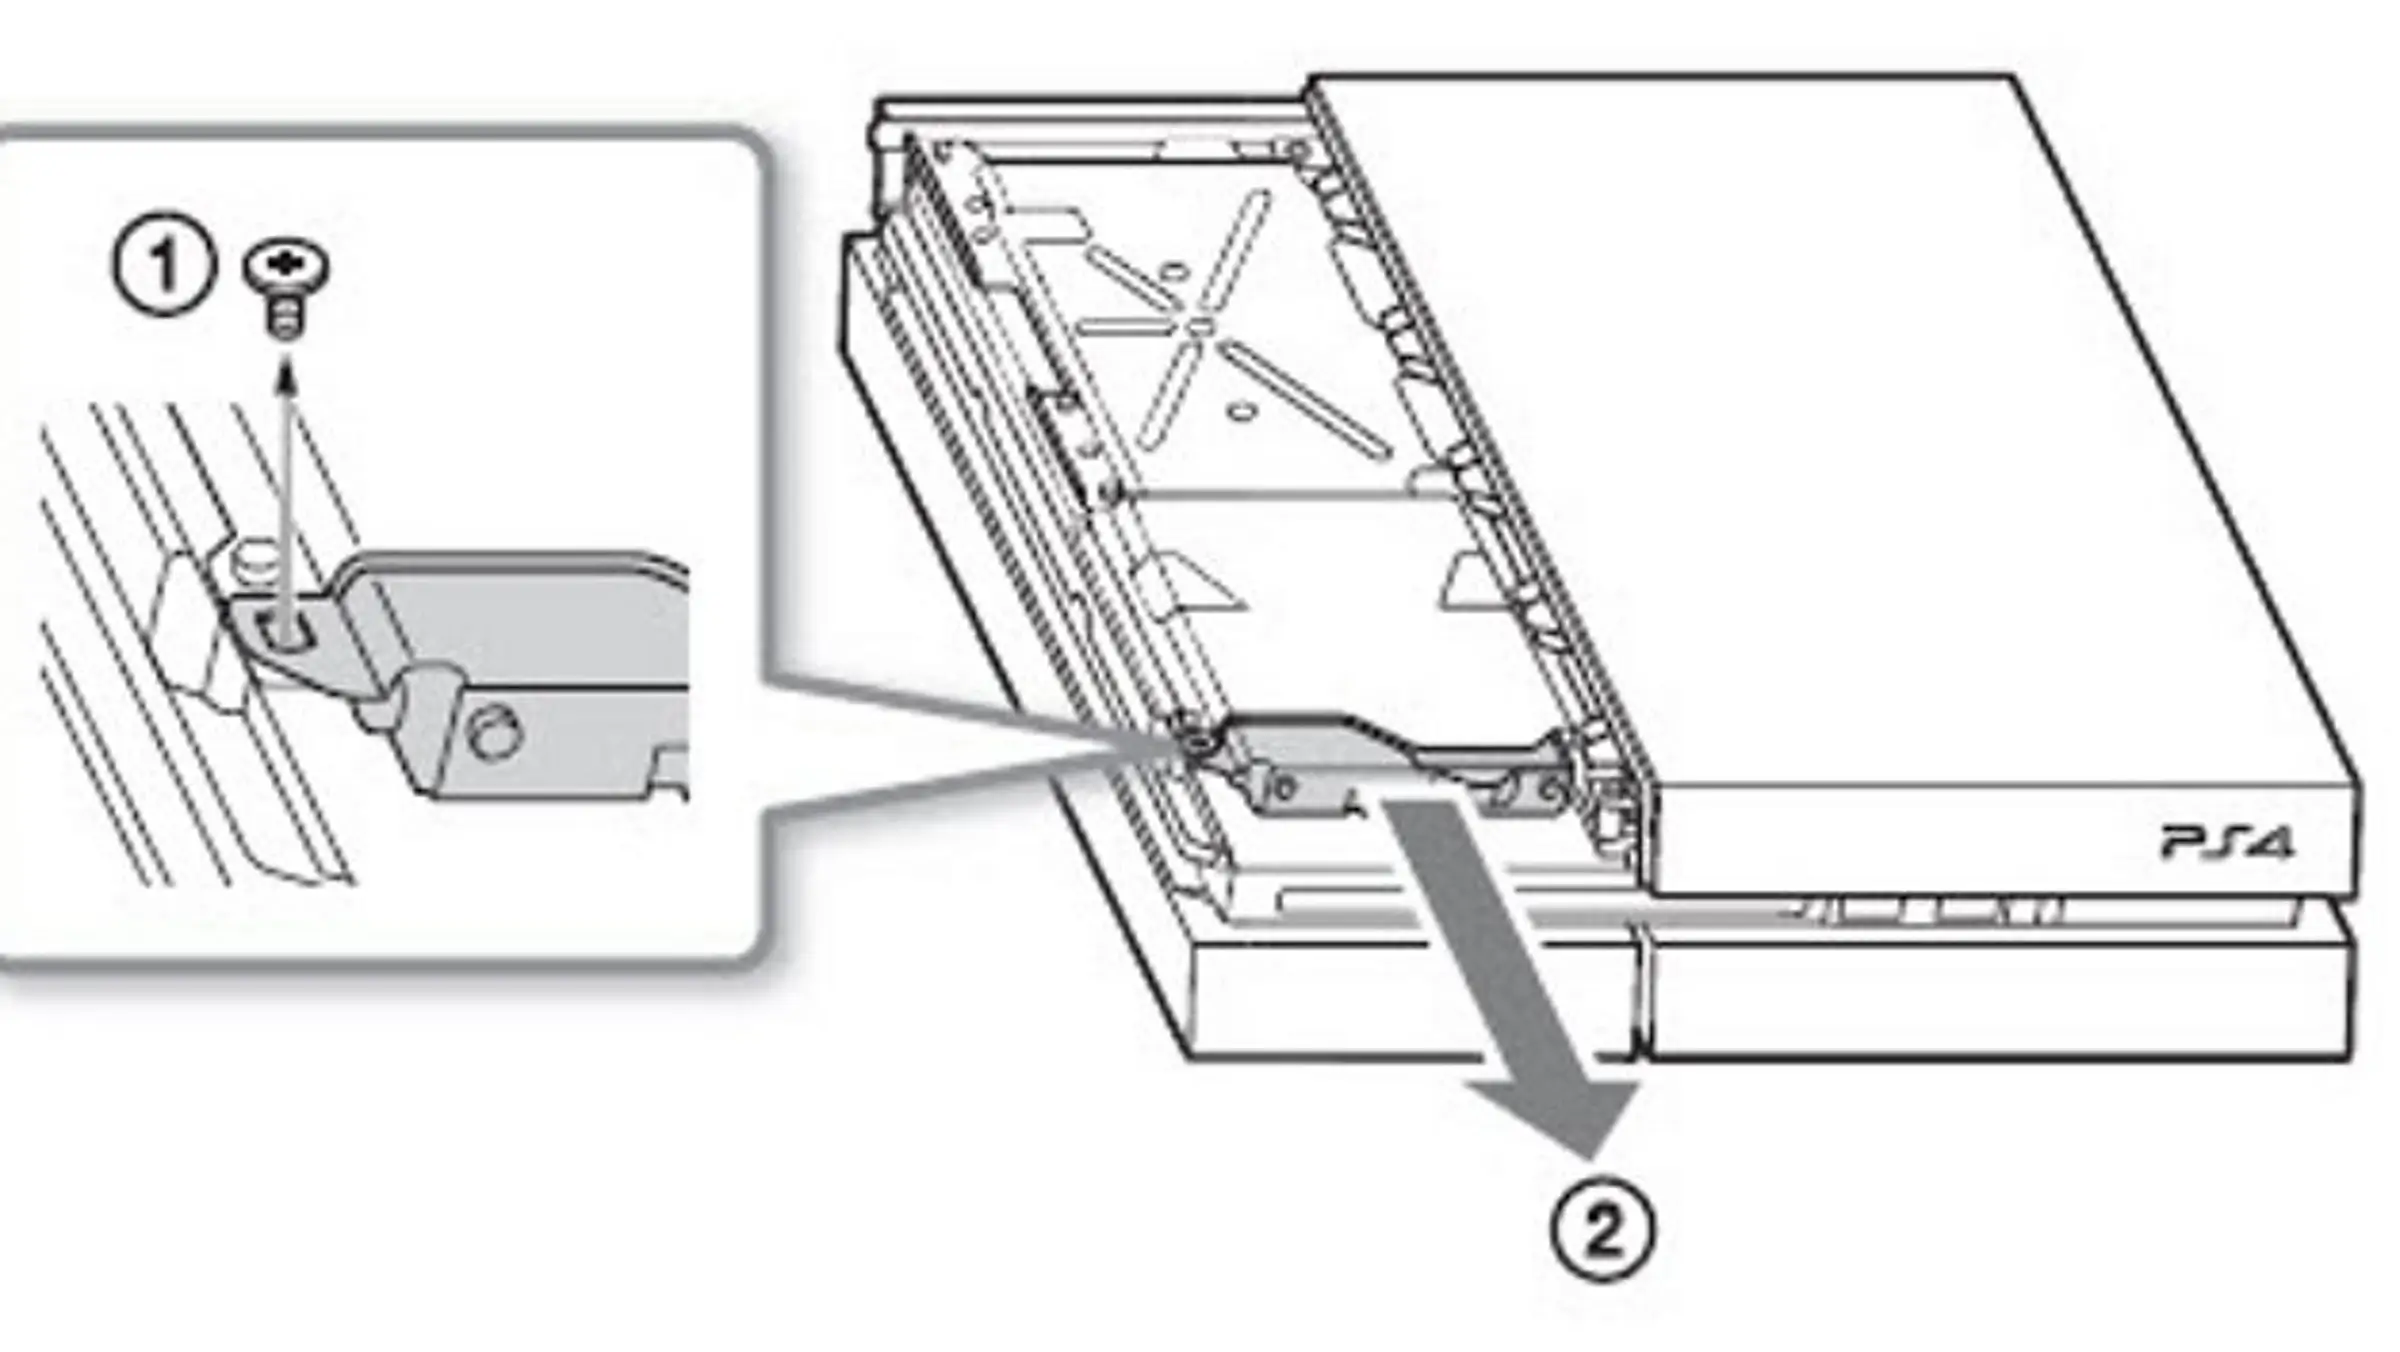
1- Remove the screw on side.
2- Pull the HDD toward the front of the system to remove it.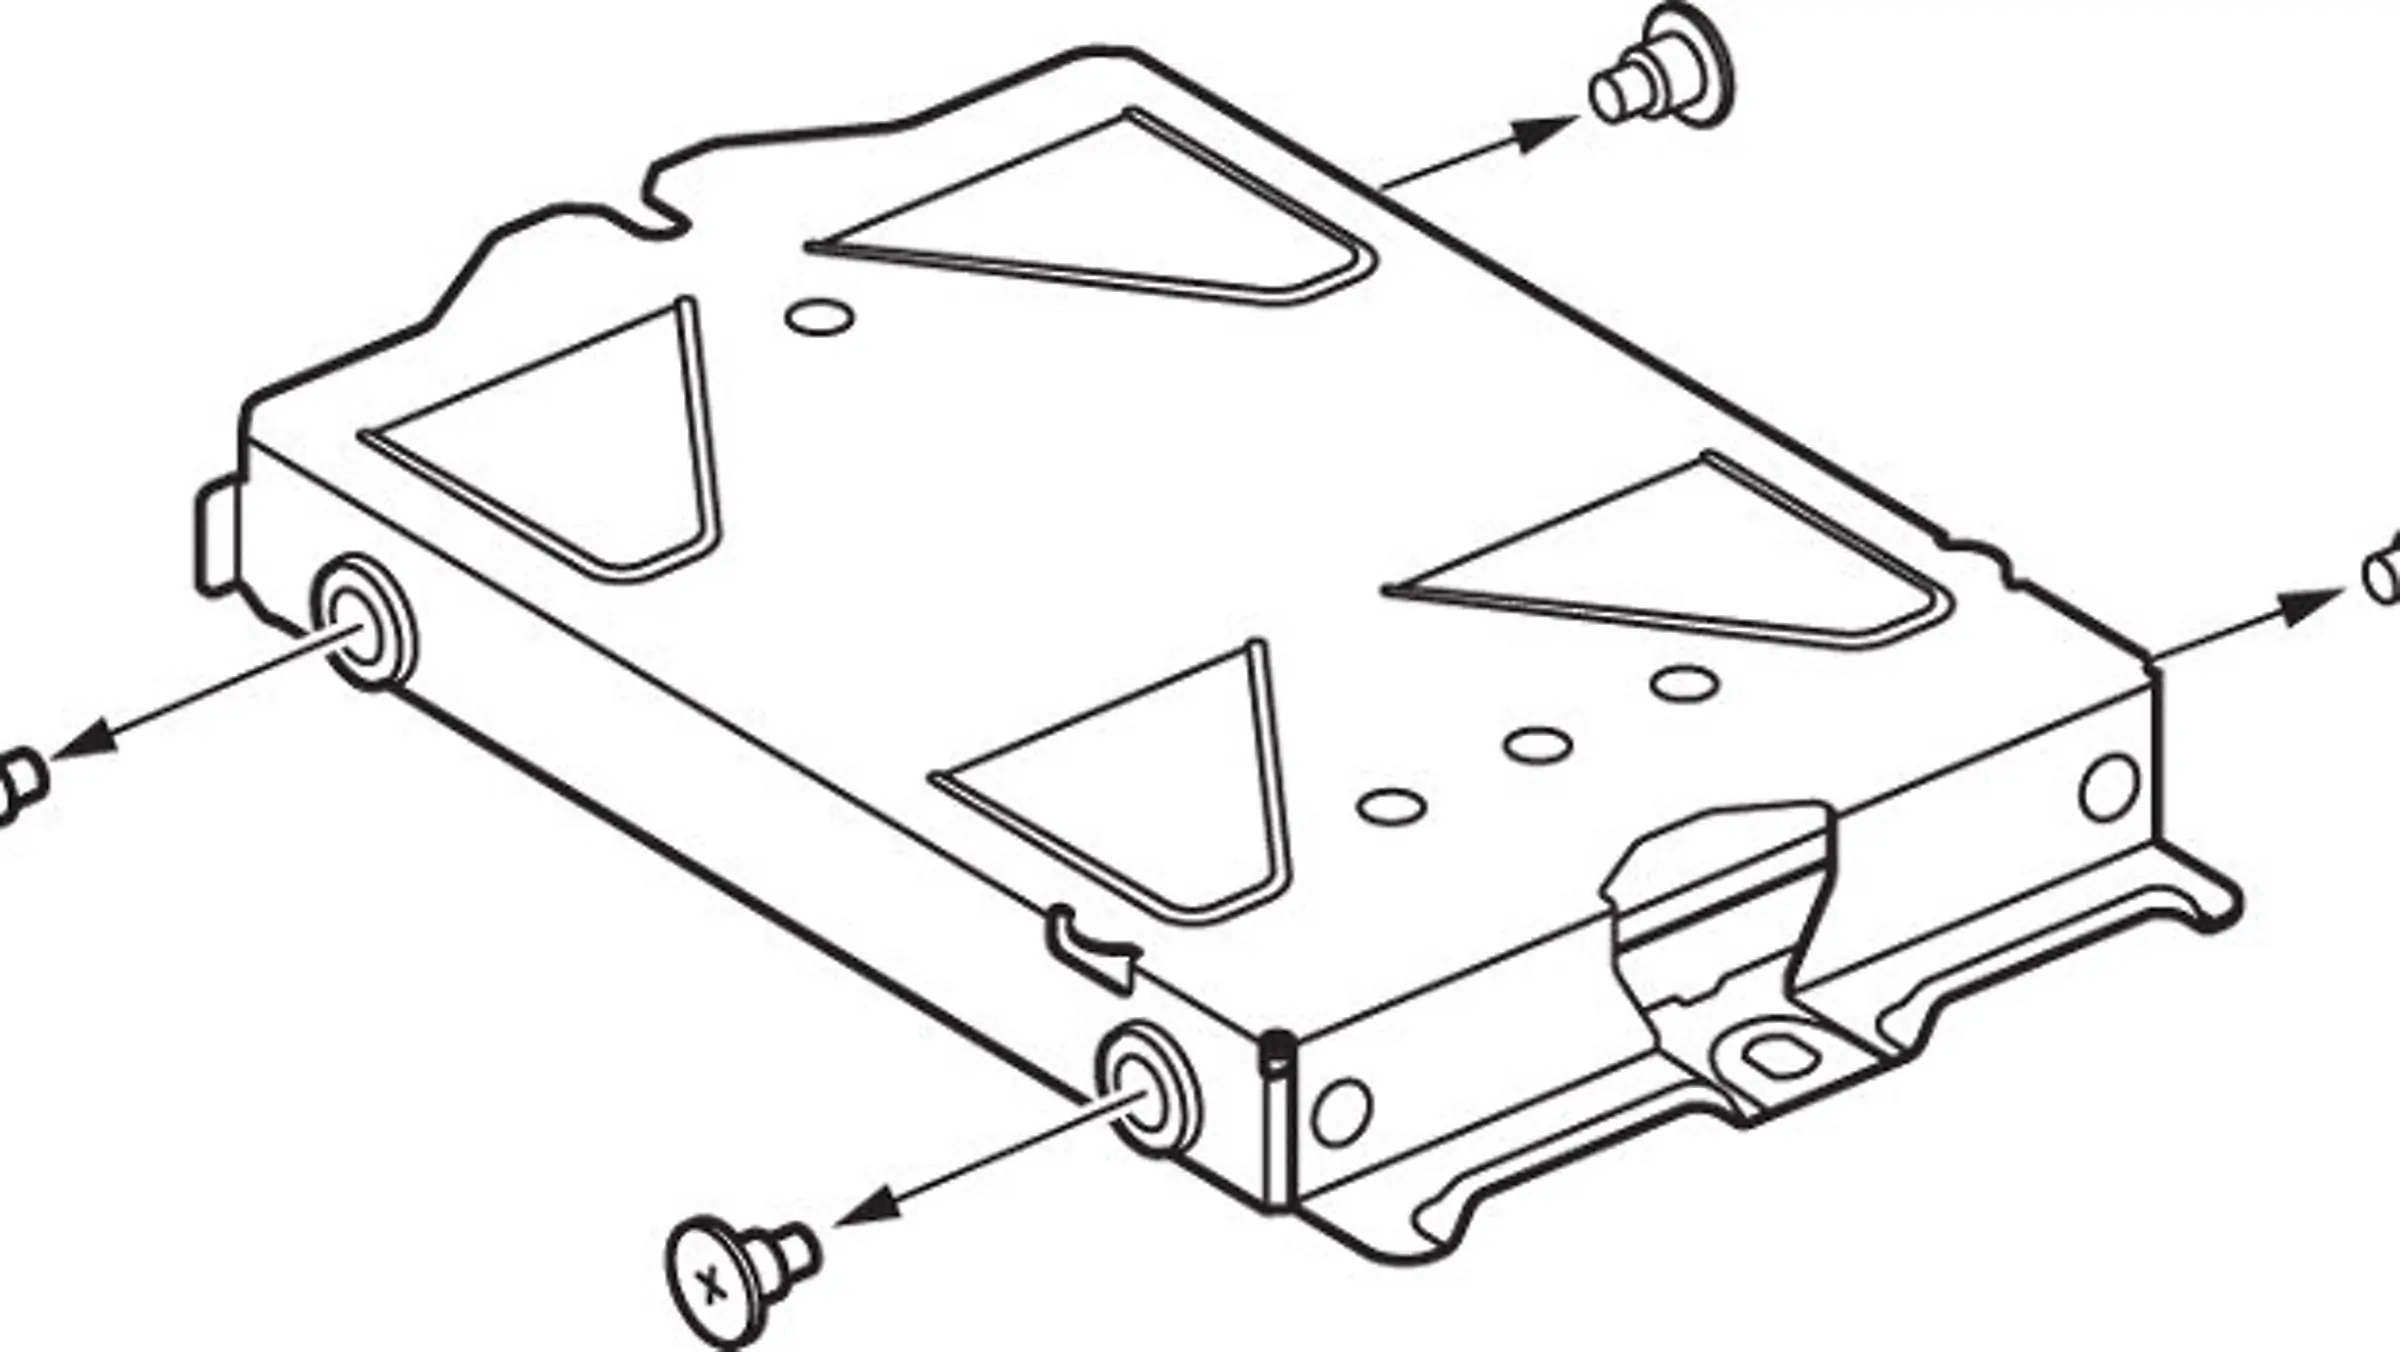
1- Remove the four screws holding the HDD in the caddy.
2- Insert the replacement HDD into the caddy.
3- Insert the caddy into the PlayStation 4 bay.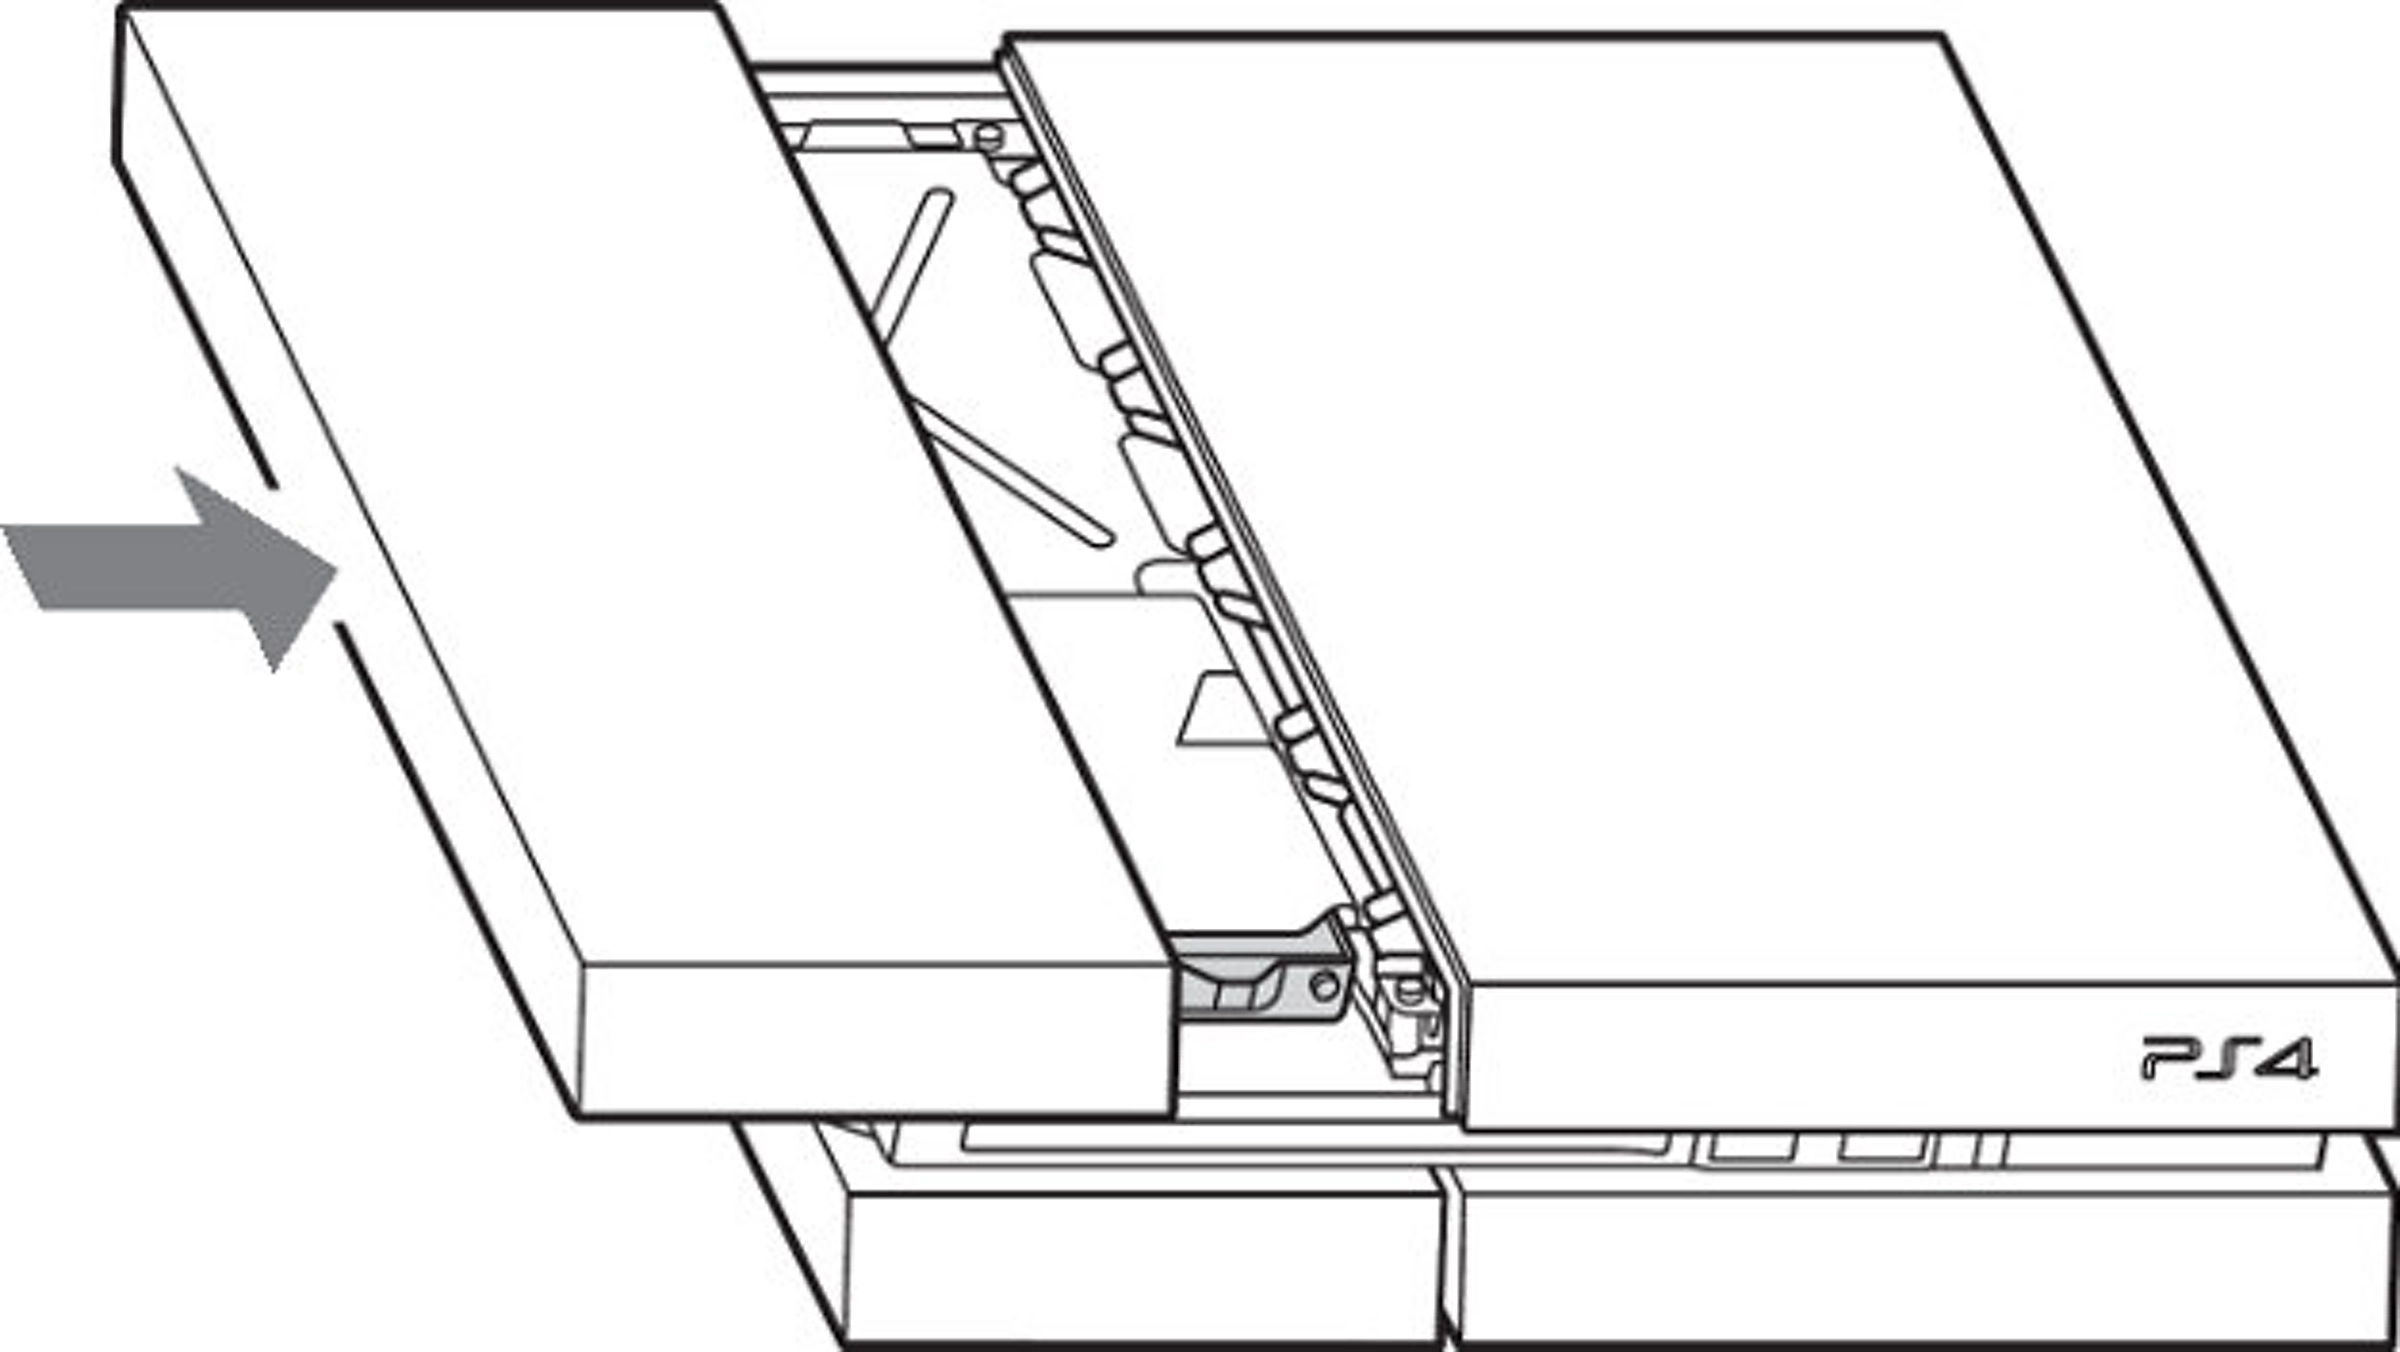
Replace the top panel. Place it over the exposed section of the PlayStation 4, about 7mm away from the seam. Now slide the panel towards the seam until it clicks into place.
- For PS4 Slim:
.webp&fileFormat=1)
Slide the HDD bay cover in the direction of the arrow to remove it.
.webp&fileFormat=1)
1- Remove the screw.
2- Pull-on the hard disc drive with the mounting bracket to remove it..webp&fileFormat=1)
Remove the screws (four places). Do not remove the rubber inserts from the screw holes.
.webp&fileFormat=1)
1- Remove the HDD from the mounting bracket and insert the replacement.
2- Replace the screws; being careful not to over-tighten them..webp&fileFormat=1)
Attach the HDD to the system using the screw. Be sure to fully insert the HDD in the HDD bay.
- For PS4 Pro:
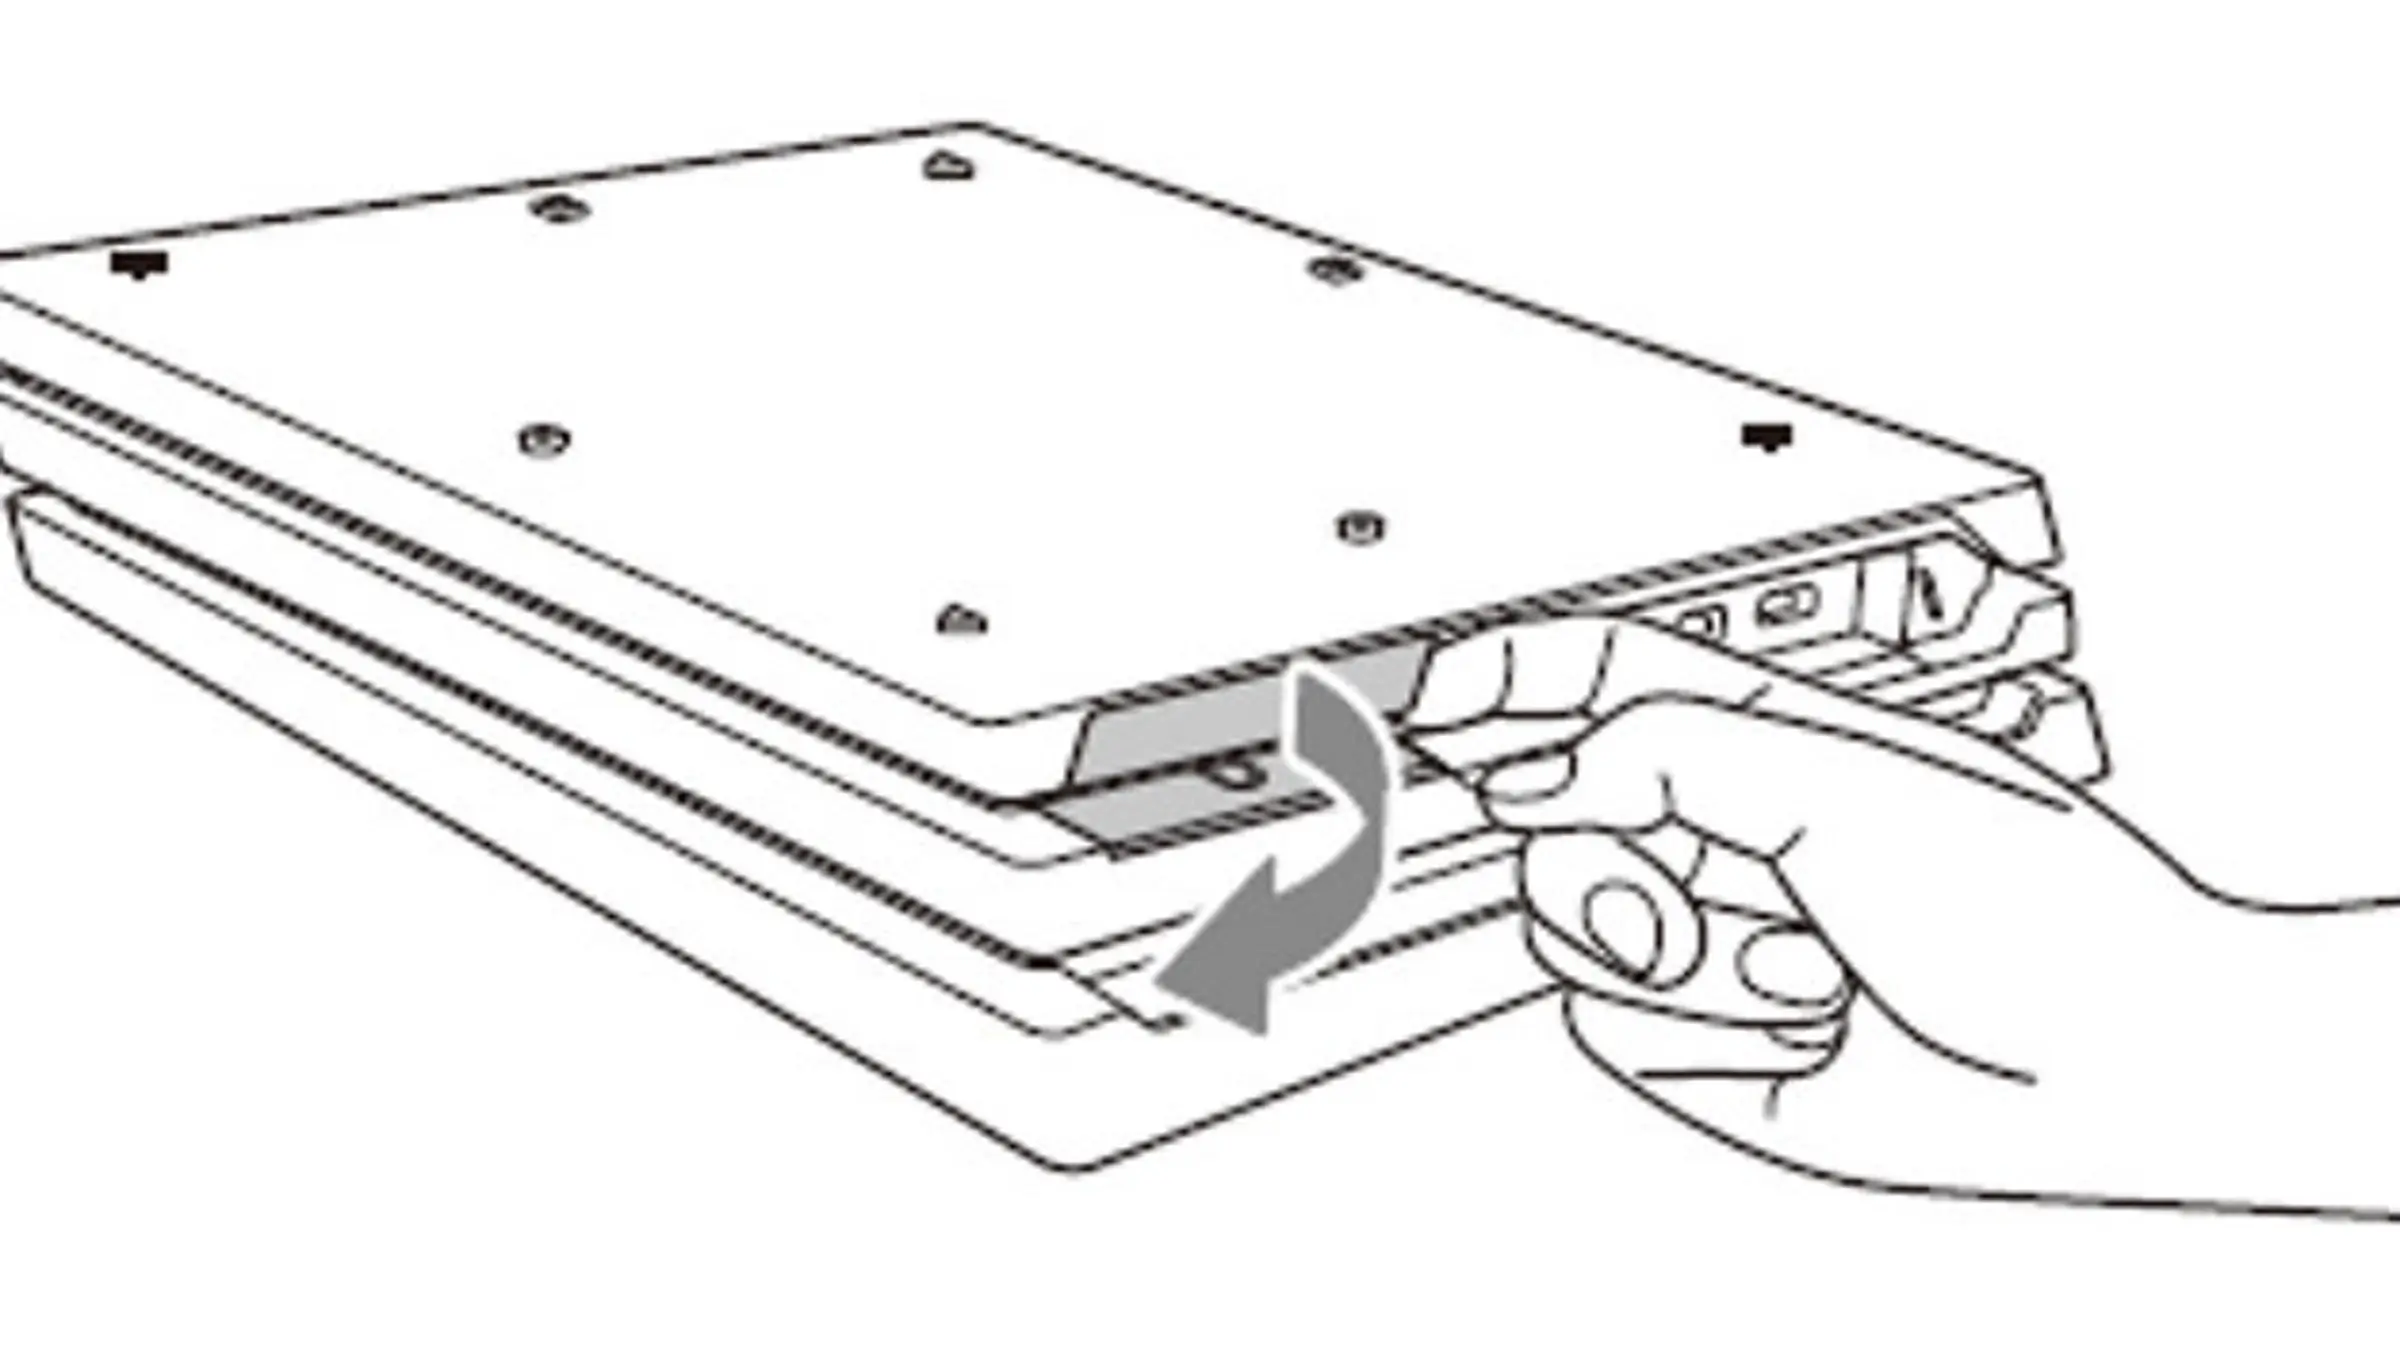
Remove from the right side first.
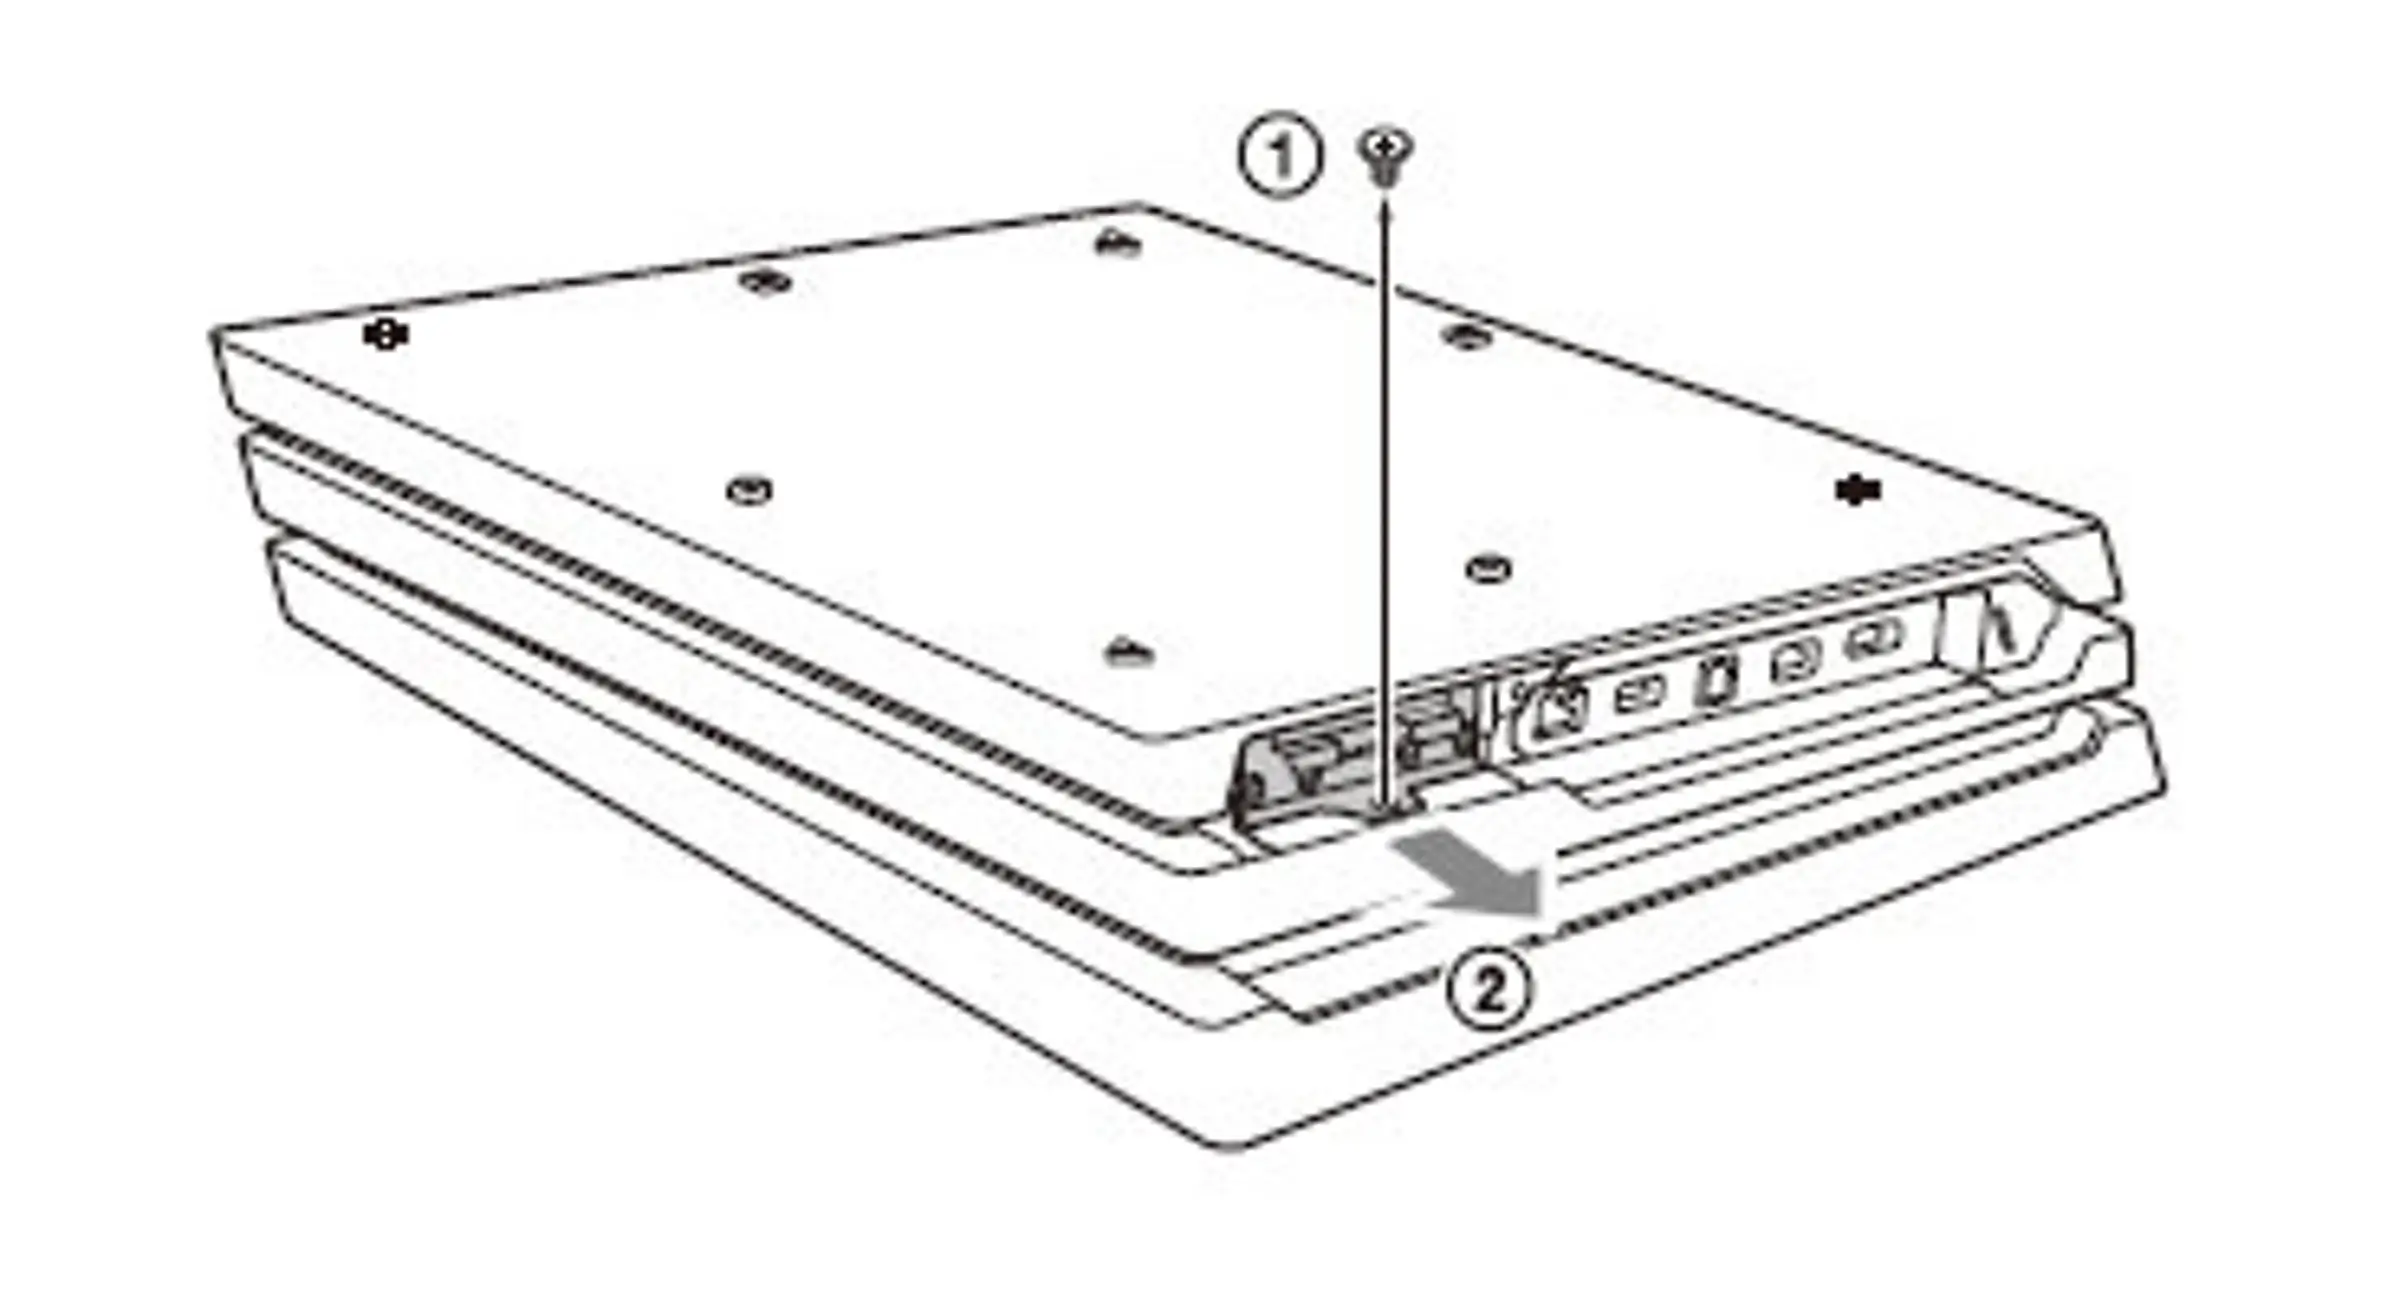
Remove the screw (1) and pull the HDD mounting bracket (2) to remove it.
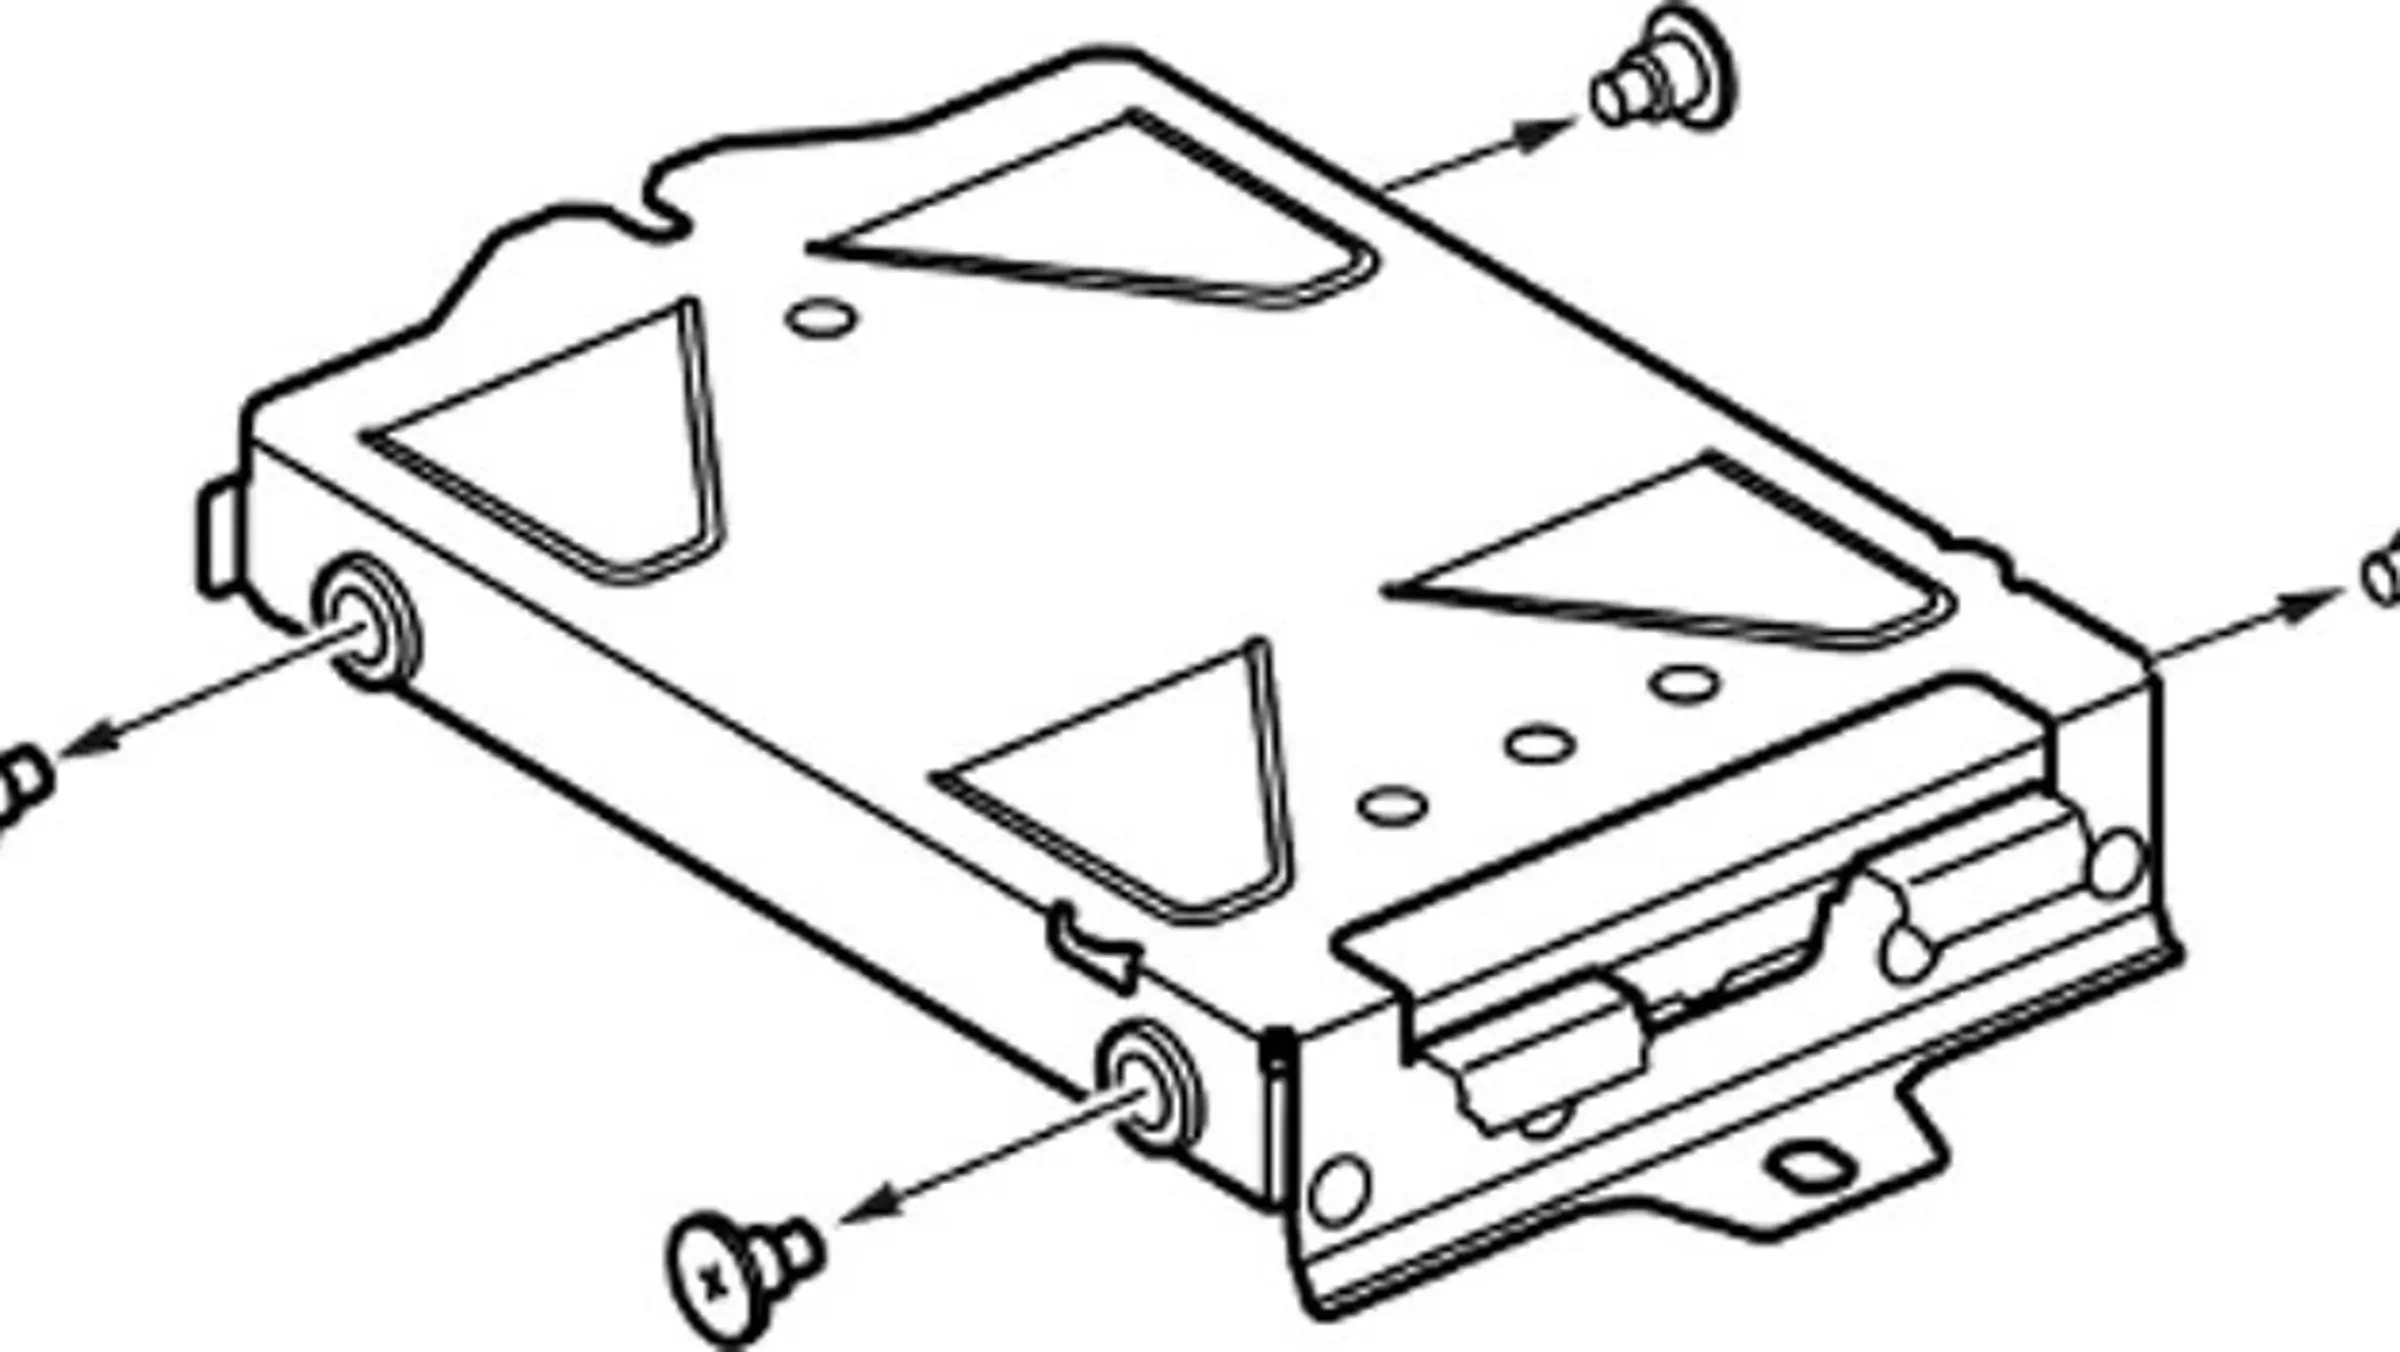
1- Remove the four screws from the HDD mounting bracket.
2- Remove the HDD from the mounting bracket and insert the replacement.
3- Replace the screws; being careful not to over-tighten them.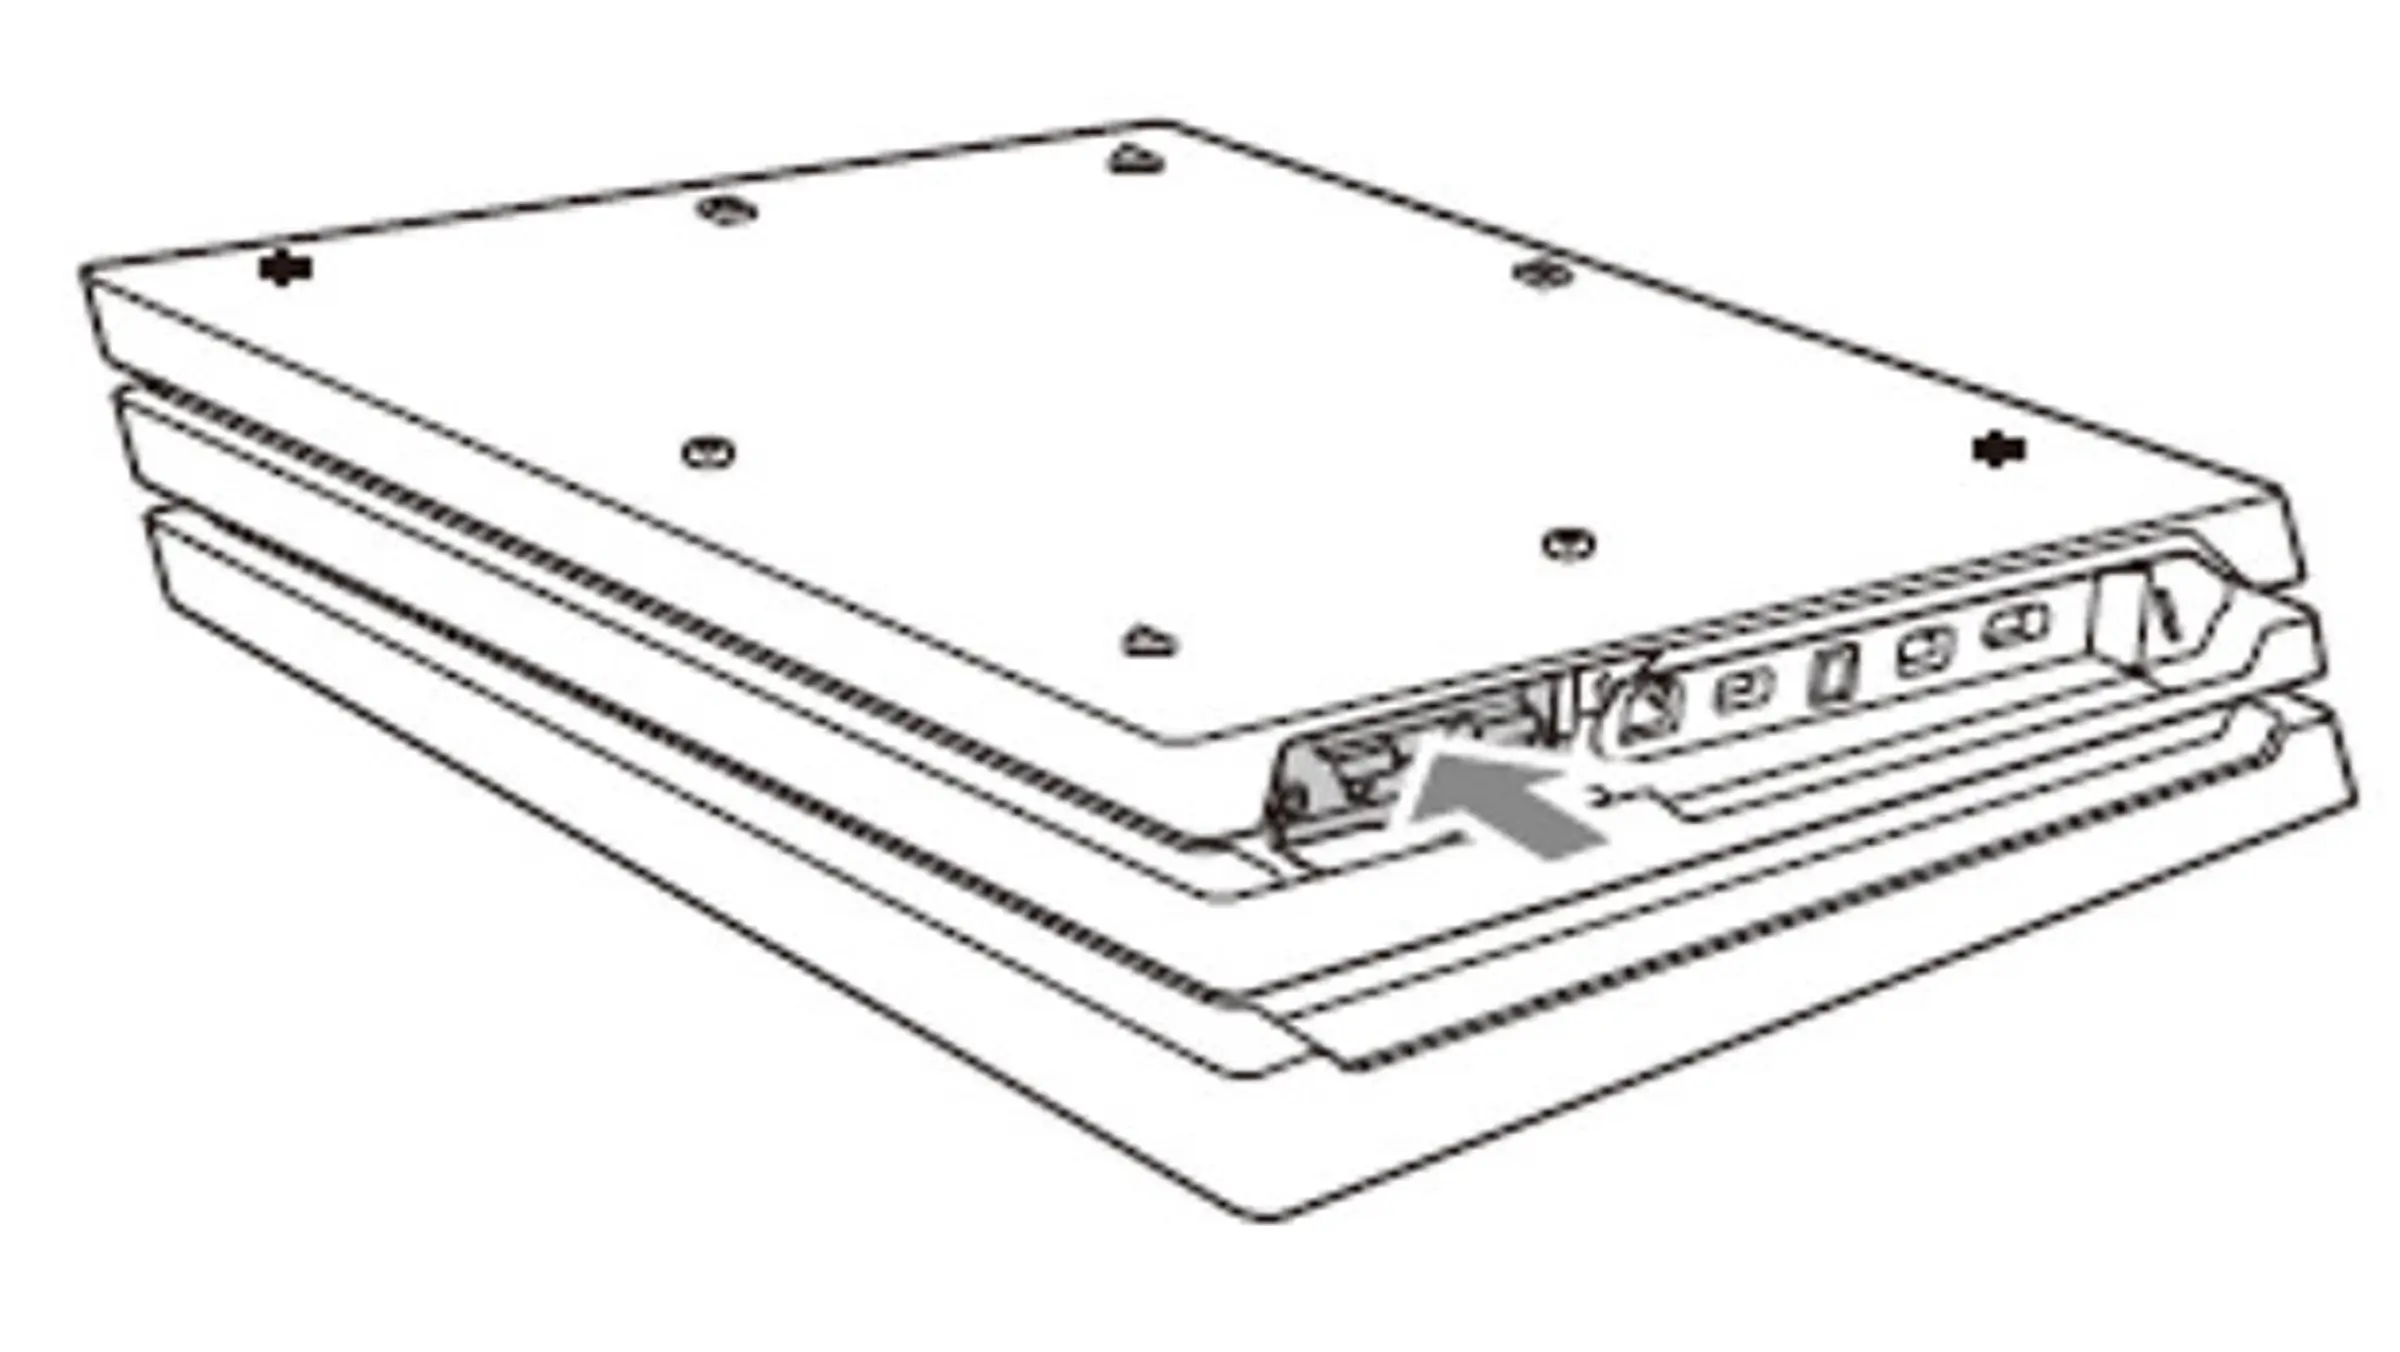
1- Reinsert the HDD mounting bracket.
2- Replace the screw.
3- Re-attach the HDD cover.
- For PS4 Original:
- Replace the drive: Remove the old HDD from the bracket and install the PUSKILL SSD.
- Reinstall the system software:
- Download the latest PS4 firmware from the PlayStation support site.
- Copy it to a USB drive formatted to FAT32, under a folder named
PS4 > UPDATE. - Insert the USB drive into the PS4, boot into Safe Mode, and select "Initialize PS4 (Reinstall System Software)."
- Restore your data: Use the backup to restore your saved data.
Upgrade your gaming experience today with the PUSKILL 2.5 SATA3 1TB SSD for PS4!
Specifications
Product
- Condition
- New
- Release date
- 05 August 2024
Features
- Storage Capacity
- 1TB
More details
- Type
- SATA SSD
- Read Speed
- 550 MB/s
- Write Speed
- 450 MB/s
- Form Factor
- 2.5-inch
- Interface
- SATA III

You may also like

Oxide Room 104 - PS5
PS5 Games EGP 1,499
EA Sports FC 27 - Arabic and English - PS5
PS5 Games EGP 3,699
UNCHARTED 4: A Thief's End (Arabic and English) - PS4 - Used
PS4 Used Games EGP 649
Grand Theft Auto VI - PS5
PS5 Games Pre-order Nov 19
Xbox Series S Console
Xbox Consoles EGP 29,199
Dragon Ball Xenoverse 2 - PS4
PS4 Games EGP 1,099


